Projection mapping _process and test


Augmented polygon from koosi_lab on Vimeo.

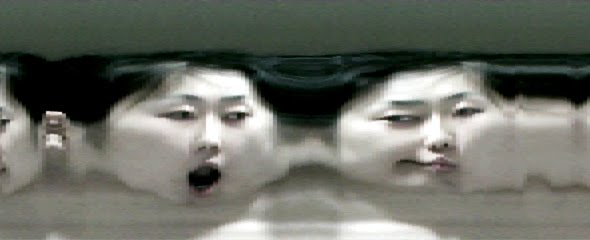
I did test projection mapping on real object.
It is not perfect yet, the mapping is slightly distorted and animation editing isn't done yet
but I will make it better with completed animation.


_
PROCESS >>

A. Drawing guide Map


Set up the projector and 3d object position.
Then clon the computer and projector screen.
Open Photoshop in fullscreen and draw guide lines along the edges of the object.


This is the result of guide drawing.


B. Mapping in Maya


Import guide map file in Maya camera view,
then synchronize the guide map and 3d object by fitting camera setting.
This step is quite tricky. I need to see the details of each edges whether they're fit well or not.
Finally, lock the camera position and export the texutres from the camera view.


C. Reproject

Reproject the exported texture.
Now it is almost done.


These are the result of applying textures on real object by projection.
It is not very perfect but alomost closed.


mapping animation _testing from koosi_lab on Vimeo.

Texture animation _draft


I applied different kinds of textures.
And before I set the object position and projection, I tried testing animaion.


mapping texture_testing from koosi_lab on Vimeo.

This is just draft short time animaion to see how's the feeling.
I will adjust the detail texture, time length and transition.

Mapping texture test


I played around with texture animation.
Those are quite basic texturing but it is interesting the anmiation chaged by small adjusting.


Smoke spreads -Smoke movie jpeg sequences texturing


Wave + Lamp


Lamp + Check
I like this because it reminds Dazzle camouflage.


Lines following along the edges.
Lamp + Lamp


Each faces have different colors
Env ball + Lamp

Complex model _final

Final polygon model


Modeling in Maya

I made more complicated model for final.
It was difficult to concern about angles if it works when it is projected.

Pepakura exporting and print in two A0, same as previous step.

Because it has many polygons, it should be printed in bigger paper. Otherwise, it will be very small but maximum size of printing paper is A0 so I decided them print in two A0.
Fortunately, it is spilted automatically two segments in Pepakura which makes easier.
There was some errors but they were not that big problem which I could simply handle it.

I imported them in Illustrator and resized for two A0 then printed in 300g Drafting paper.


Same as the previous step, I cutted the printed paper, folded and assembled.


Final model by paper folding

Making big size polygon object & test projection


I did 3d modeling in Maya and export in Pepakura.


And unfold the 3d model in Pepakura


I printed it as A0 size. Because default printing A0 paper is too thin, I used 200g thick kent paper (788x1091) which is slightly smaller than A0.
Then I cutted and folded paper.


This is the 3d object in real.


Next, I projected into this obejct and drew guide dots in Power point. Through the dots, I drew line map in Illustrator and reprojected the map into the object like below.
From this scene, I can guess how it look when I add animated texture.

And import map image in Maya camera view then modify the camera view to fit the map and model. It can not be perfect, so there is a chance to modify the model slightly. This step is needed to synchronize Maya camera and real projector.


Mapping test shot

3d polygon

Beginning for Projection Mapping.


I made simple 3d polygon object which is consists of triangle surfaces in Maya.


Then exported as obj file for Pepacura to make a real 3d object.
Pepacura unfolds the 3d object.


Project #1 : Motion photography

In a parking lot
_
I realized I should shoot from the top because in this kind of composition, back and front images are overlaped I couldn't see the trace exactly.


Playground
_
I shot on the top and I like the people looks like many group.
But, I want to be more higher to get better composition with telephoto lens. I am not satisfied with this composition.


_
Process
_
I shot movies and exported as sequence jpeg files and composited stack in an image using photoshop.
It was difficult to find empty big space, I want to try again.

Project #1 concept

Testing concept image.
_
choose empty space and make it looks crowded by one moving object.
when I tested it by video sequence, it is quite difficult to composite.
I think the contrast of background and object color is important.


Experimental motiongraphic photo

Experimental photography test.
Slit scanning by Processing (•Processing source code for slitscan from a live video camera)
I rotated myself and Processing captured the video as each vertical lines frame by frame.


my introduction

_
goeun lee
undergraduate major : computer science

_
my favorite work : Augmented high heel.


test_high heel projection from koosi_lab on Vimeo.

This is projection mapping on the bottom of high heel. I call this Digital Fabric.
There is two different kinds of Moire pattern. One is from fabric, another is from digital screen.
Fabric represents classic fashion and digital screen represents new media. This moire pattern is the connection of both. I want to express future fashion which is combinated with media.


I developed it and had an exhibition with David.


Augmented from koosi_lab on Vimeo.


_

project 01; Space and Motion Graphics (Still)

///////////// step 01


This is unexpected movement of a balloon which is running out of air. I attatched LED.
This is interesting because it looks like an abstract graphic image.


Because it is such a short term, this is more like a test shot.
It shows step of physical movement.